

Come on a Modernization Journey with Washington Elevator! Week 1!
Are you ready to go on a journey? In this series, we will follow a hydraulic elevator modernization from start to finish. We’ll share the process as we complete work through the project, including any unexpected challenges we face along the way. We will update the milestones in this weekly series. Big thanks to our tour guide and modernization extraordinaire, Jon! This is a real project in process being completed by Jon and his apprentice, Zach.
First, let’s start with the background. This Seattle condominium had older Motion Control Engineering (MCE) controls, a dry hydraulic power unit, GAL door operators and conventional in-ground hydraulic cylinder. We partnered with the condo to modernize the equipment to improve reliability, safety and performance. When the project is complete, they will have a new controller, power unit, door operator, fixtures and wiring. With all modernizations, some components will be retained.
Here are some pictures of the original machine room. Apologize for the poor quality. Sean took these before he knew they were going on the internet.
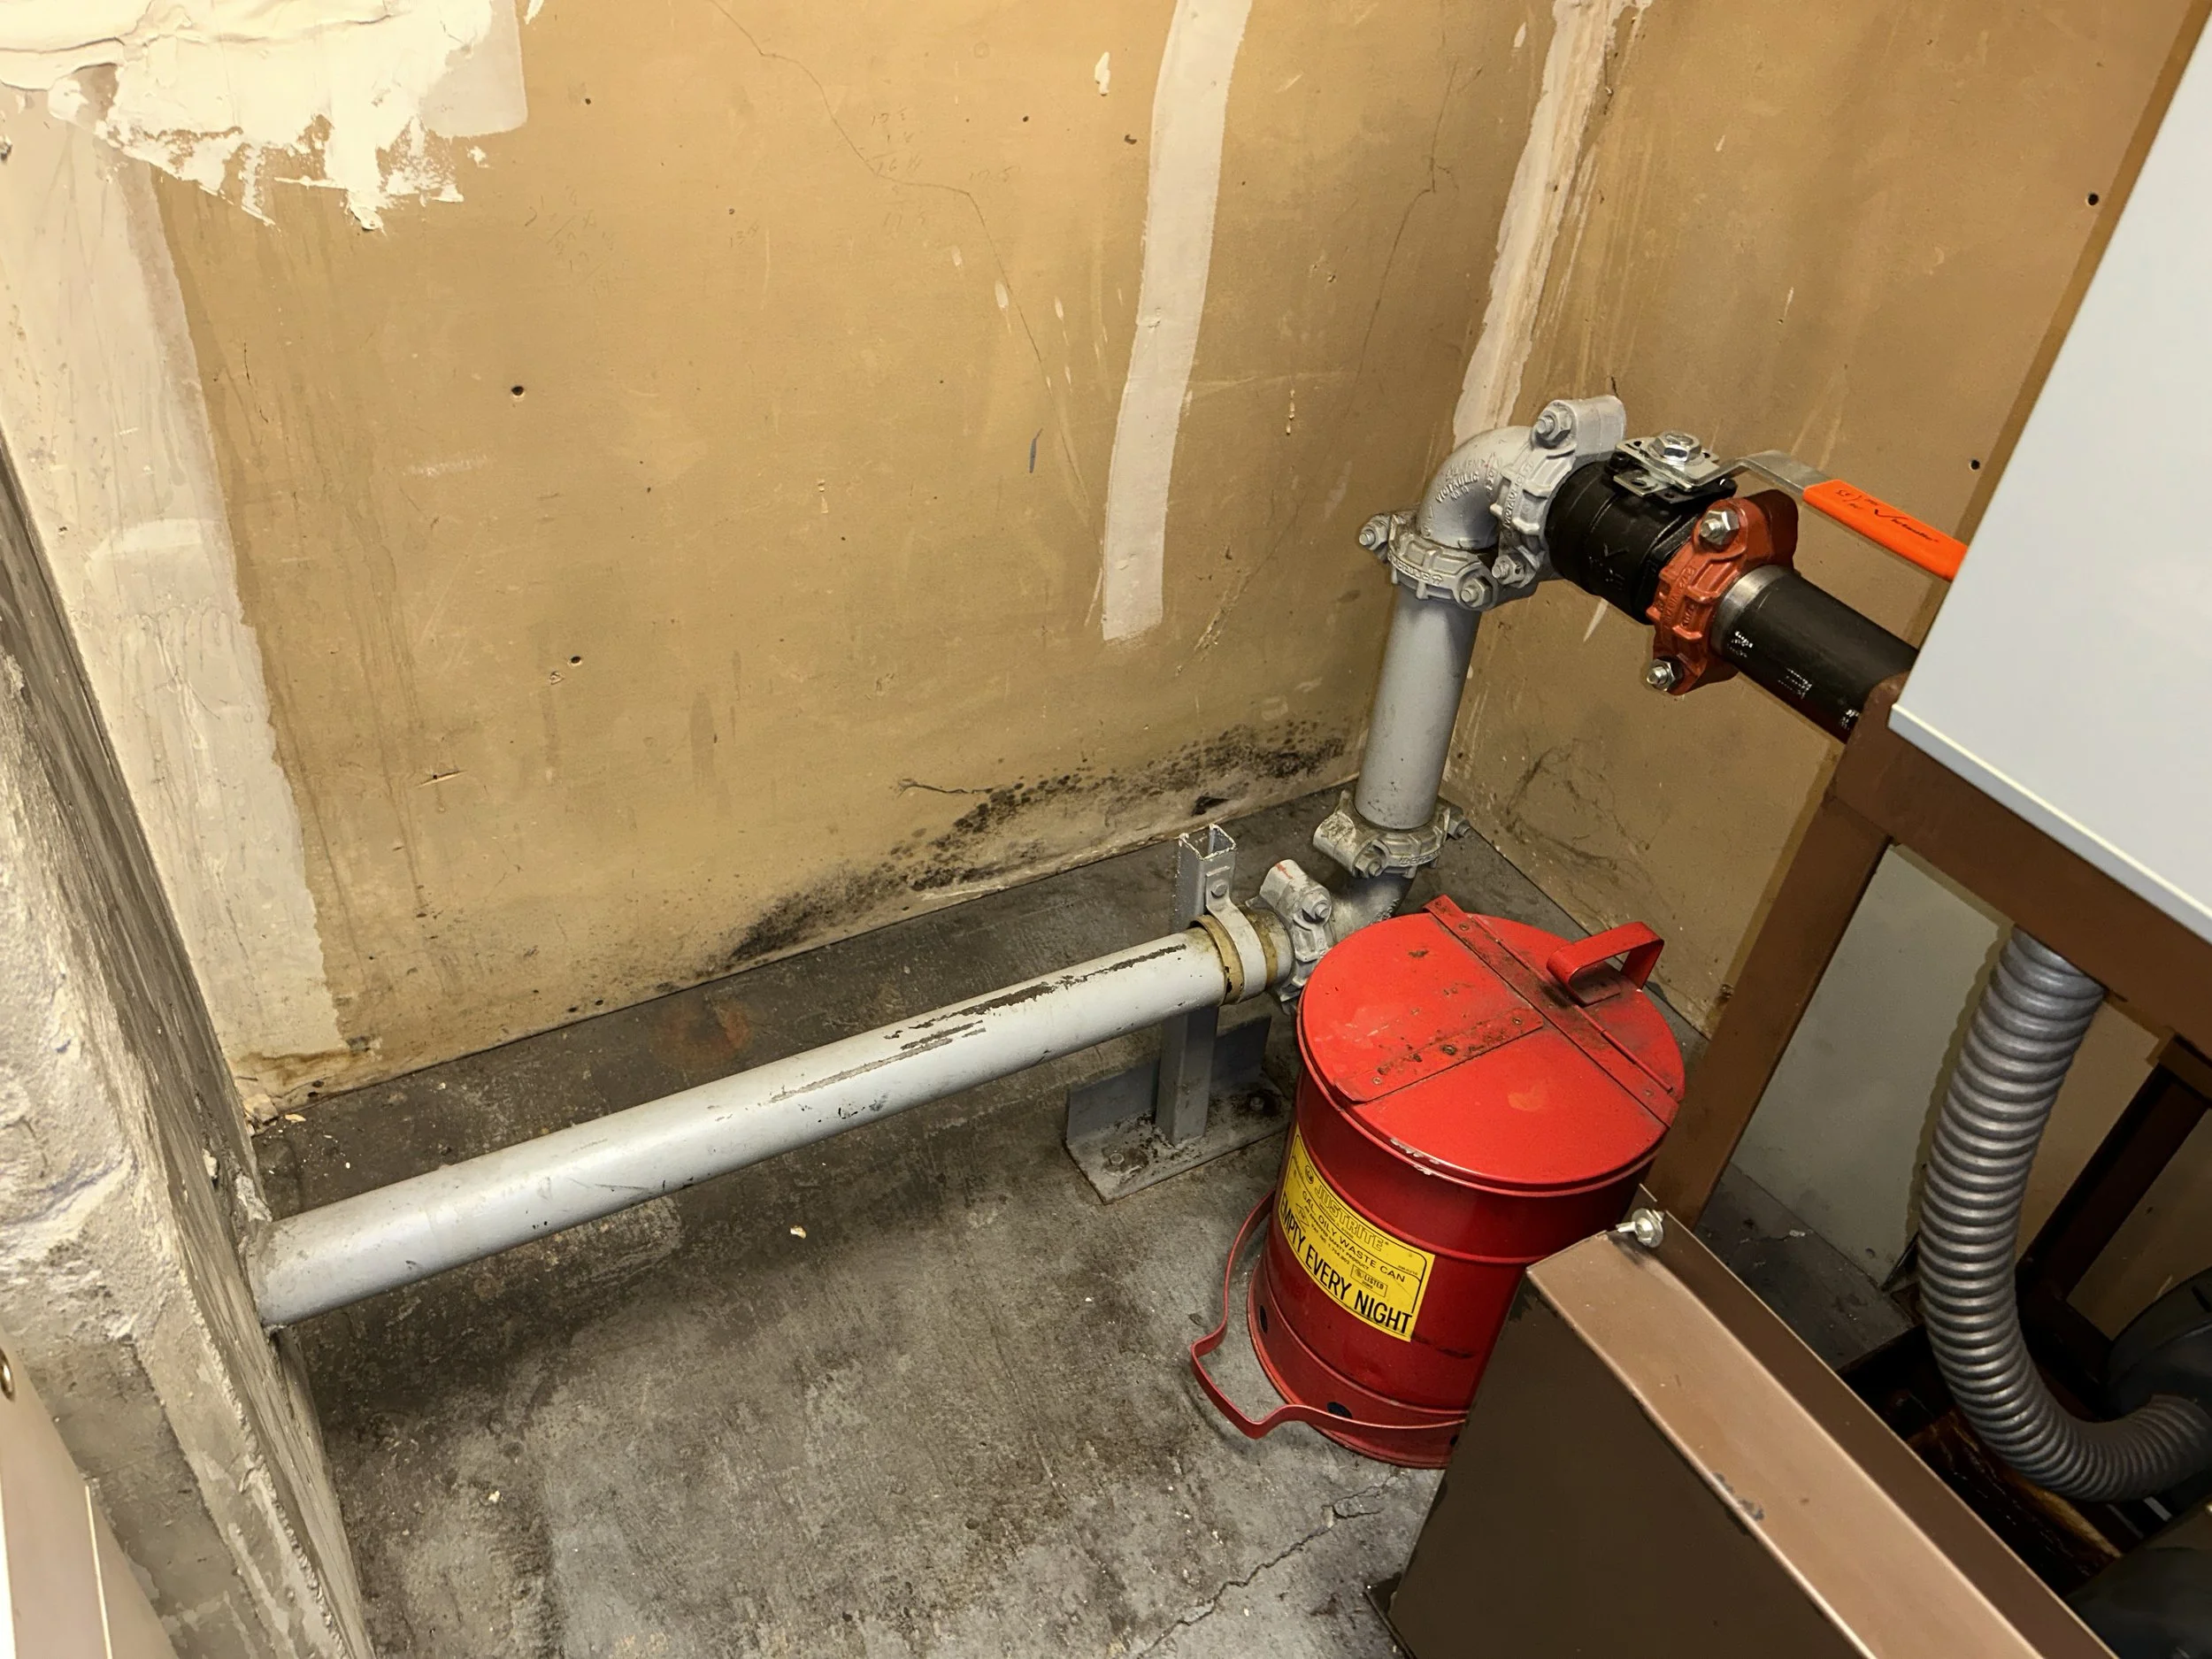
Dry power unit (brown frame on the right) with the controller (gray box) mounted to it. The hydraulic oil line runs from the elevator machine and is connected to the hydraulic cylinder in the pit.
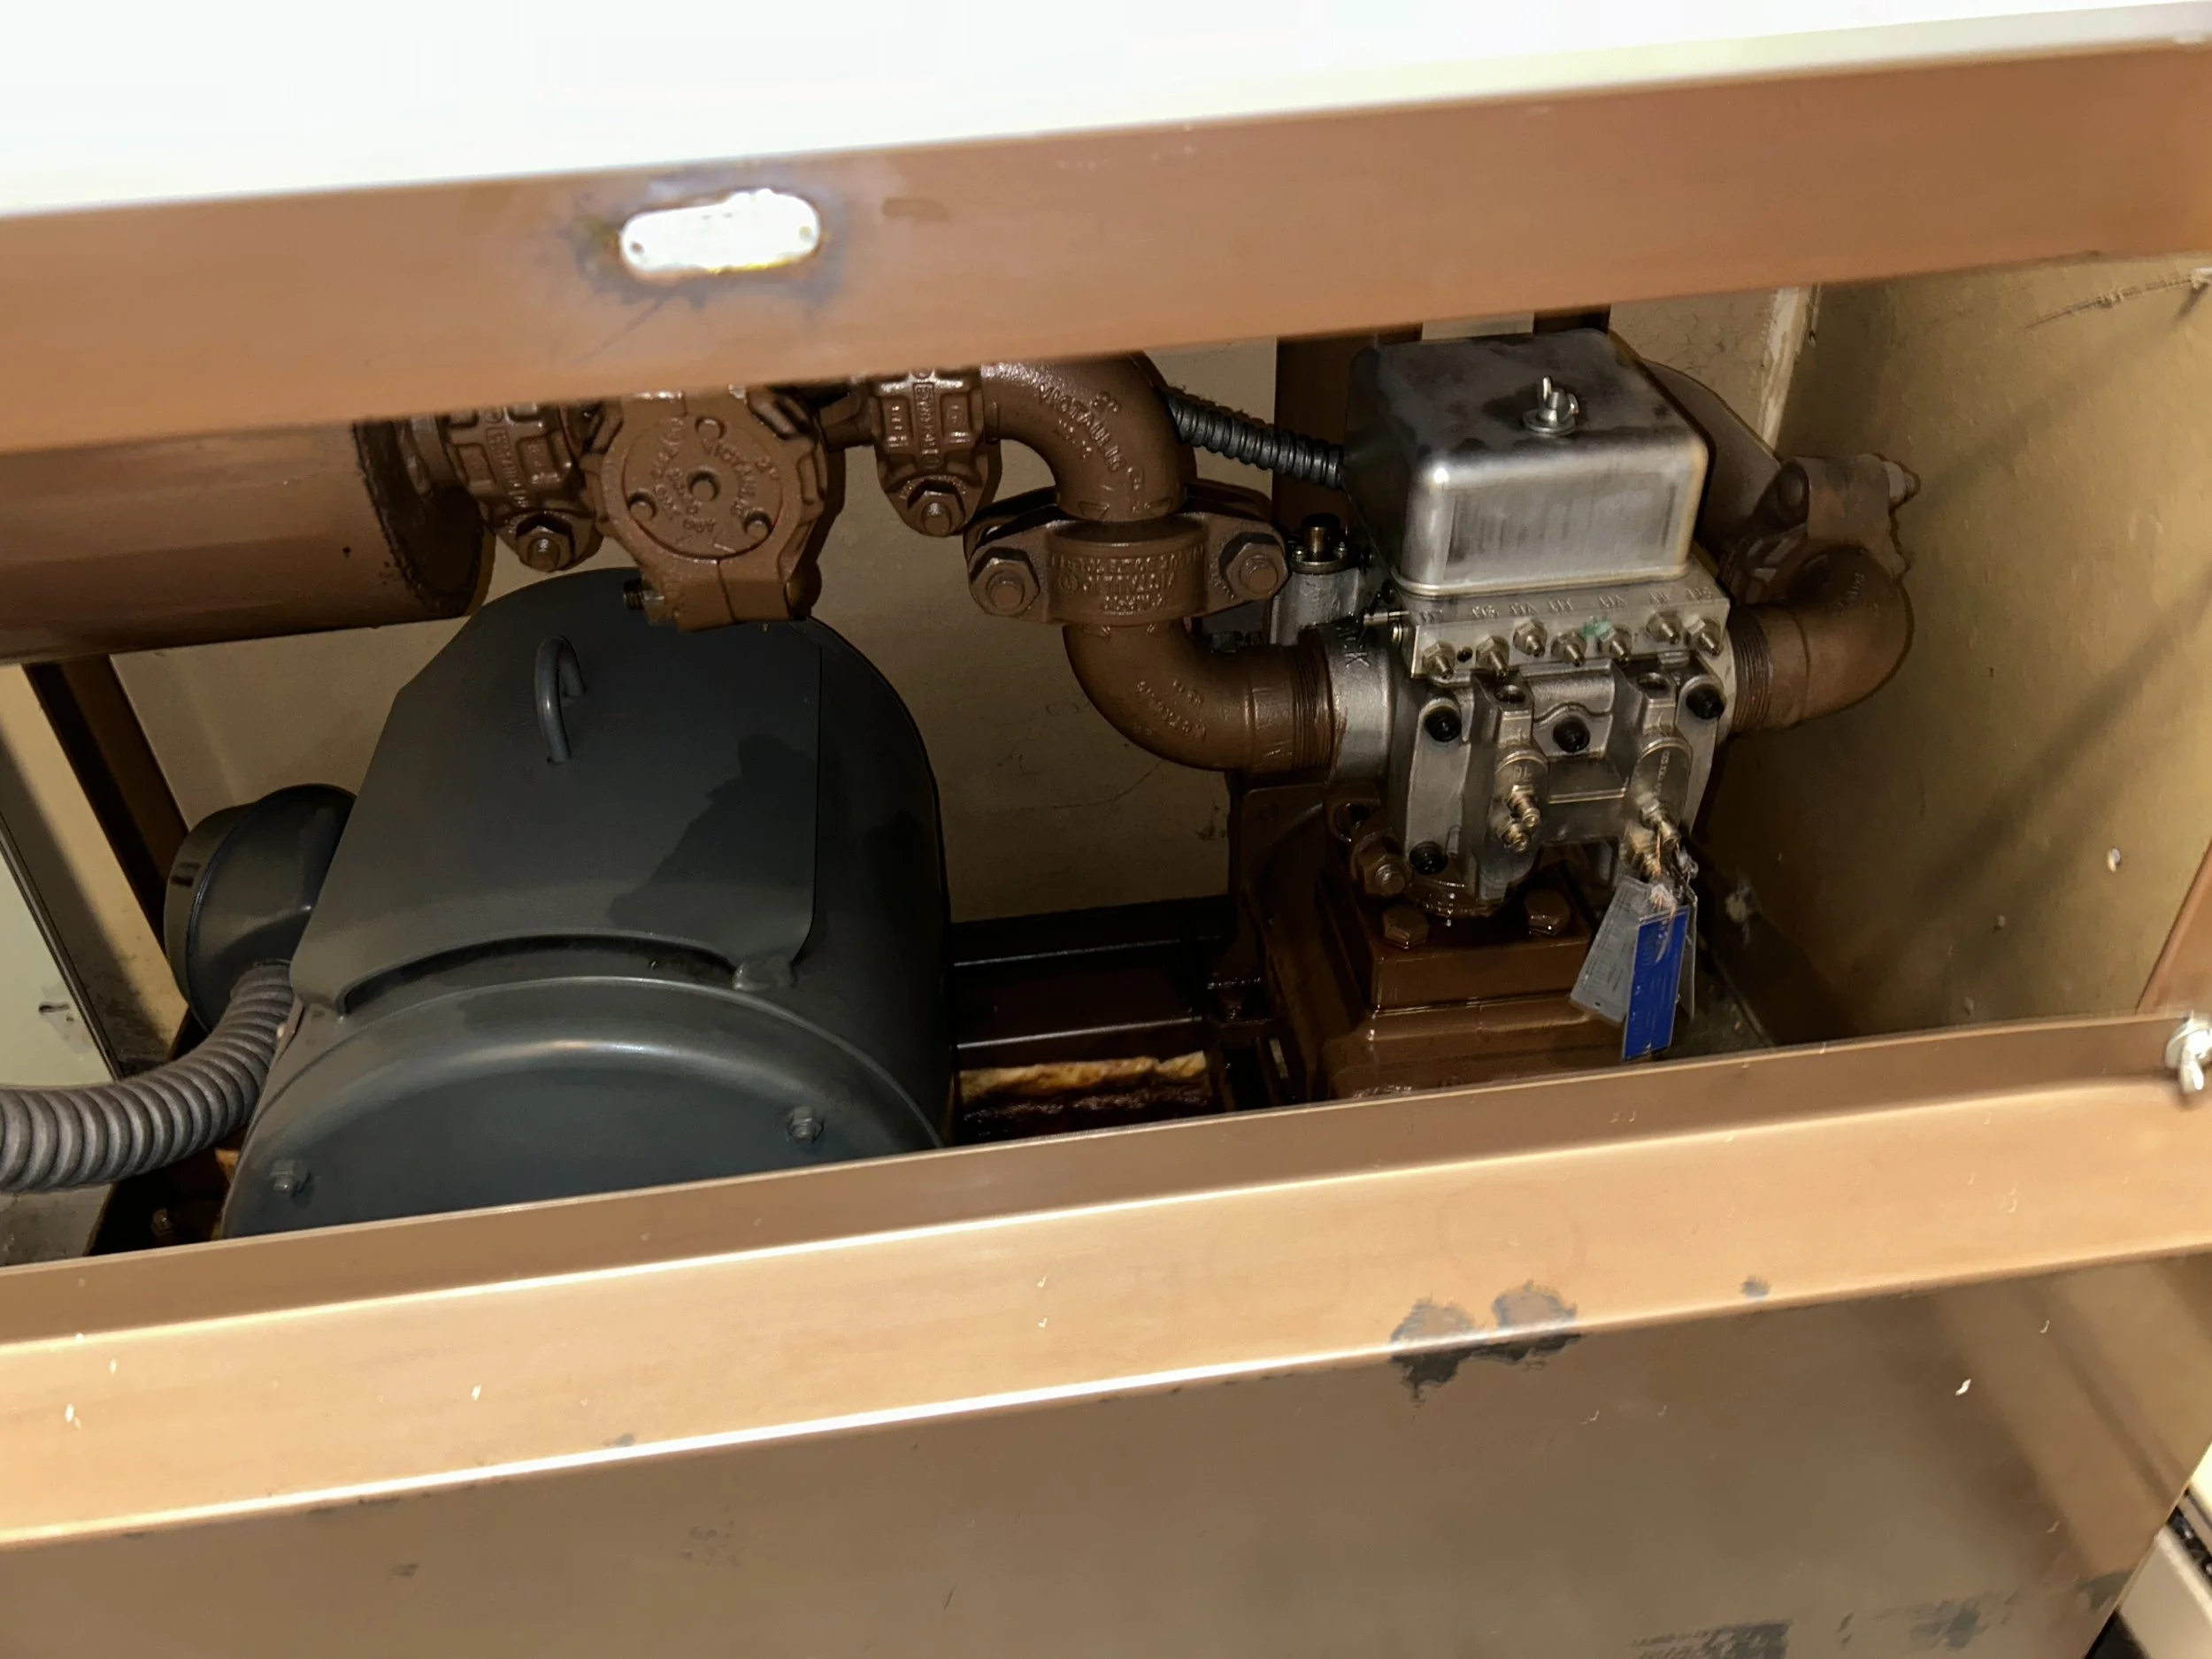
Another image of the dry power unit.
Prior to mobilization, we have gone through rounds of engineering with our vendors to custom tailor a hydraulic elevator package for this specific building. All equipment has been received, inspected and stored at our Tukwila warehouse. We’ve coordinated with the condominium to schedule the work and reviewed building rules like quiet hours, parking and staging areas. We also coordinate the completion of as much Building Related Work as possible prior to starting the elevator work. In case you missed it, there’s more on that here.
WEEK ONE. The wait is over. Time for the fun stuff! The week starts with mobilizing. Our crews bring their tools and elevator equipment to the site and set themselves up for success. Then, it’s time for DEMO! We start in the machine room, removing the old controller and power unit.
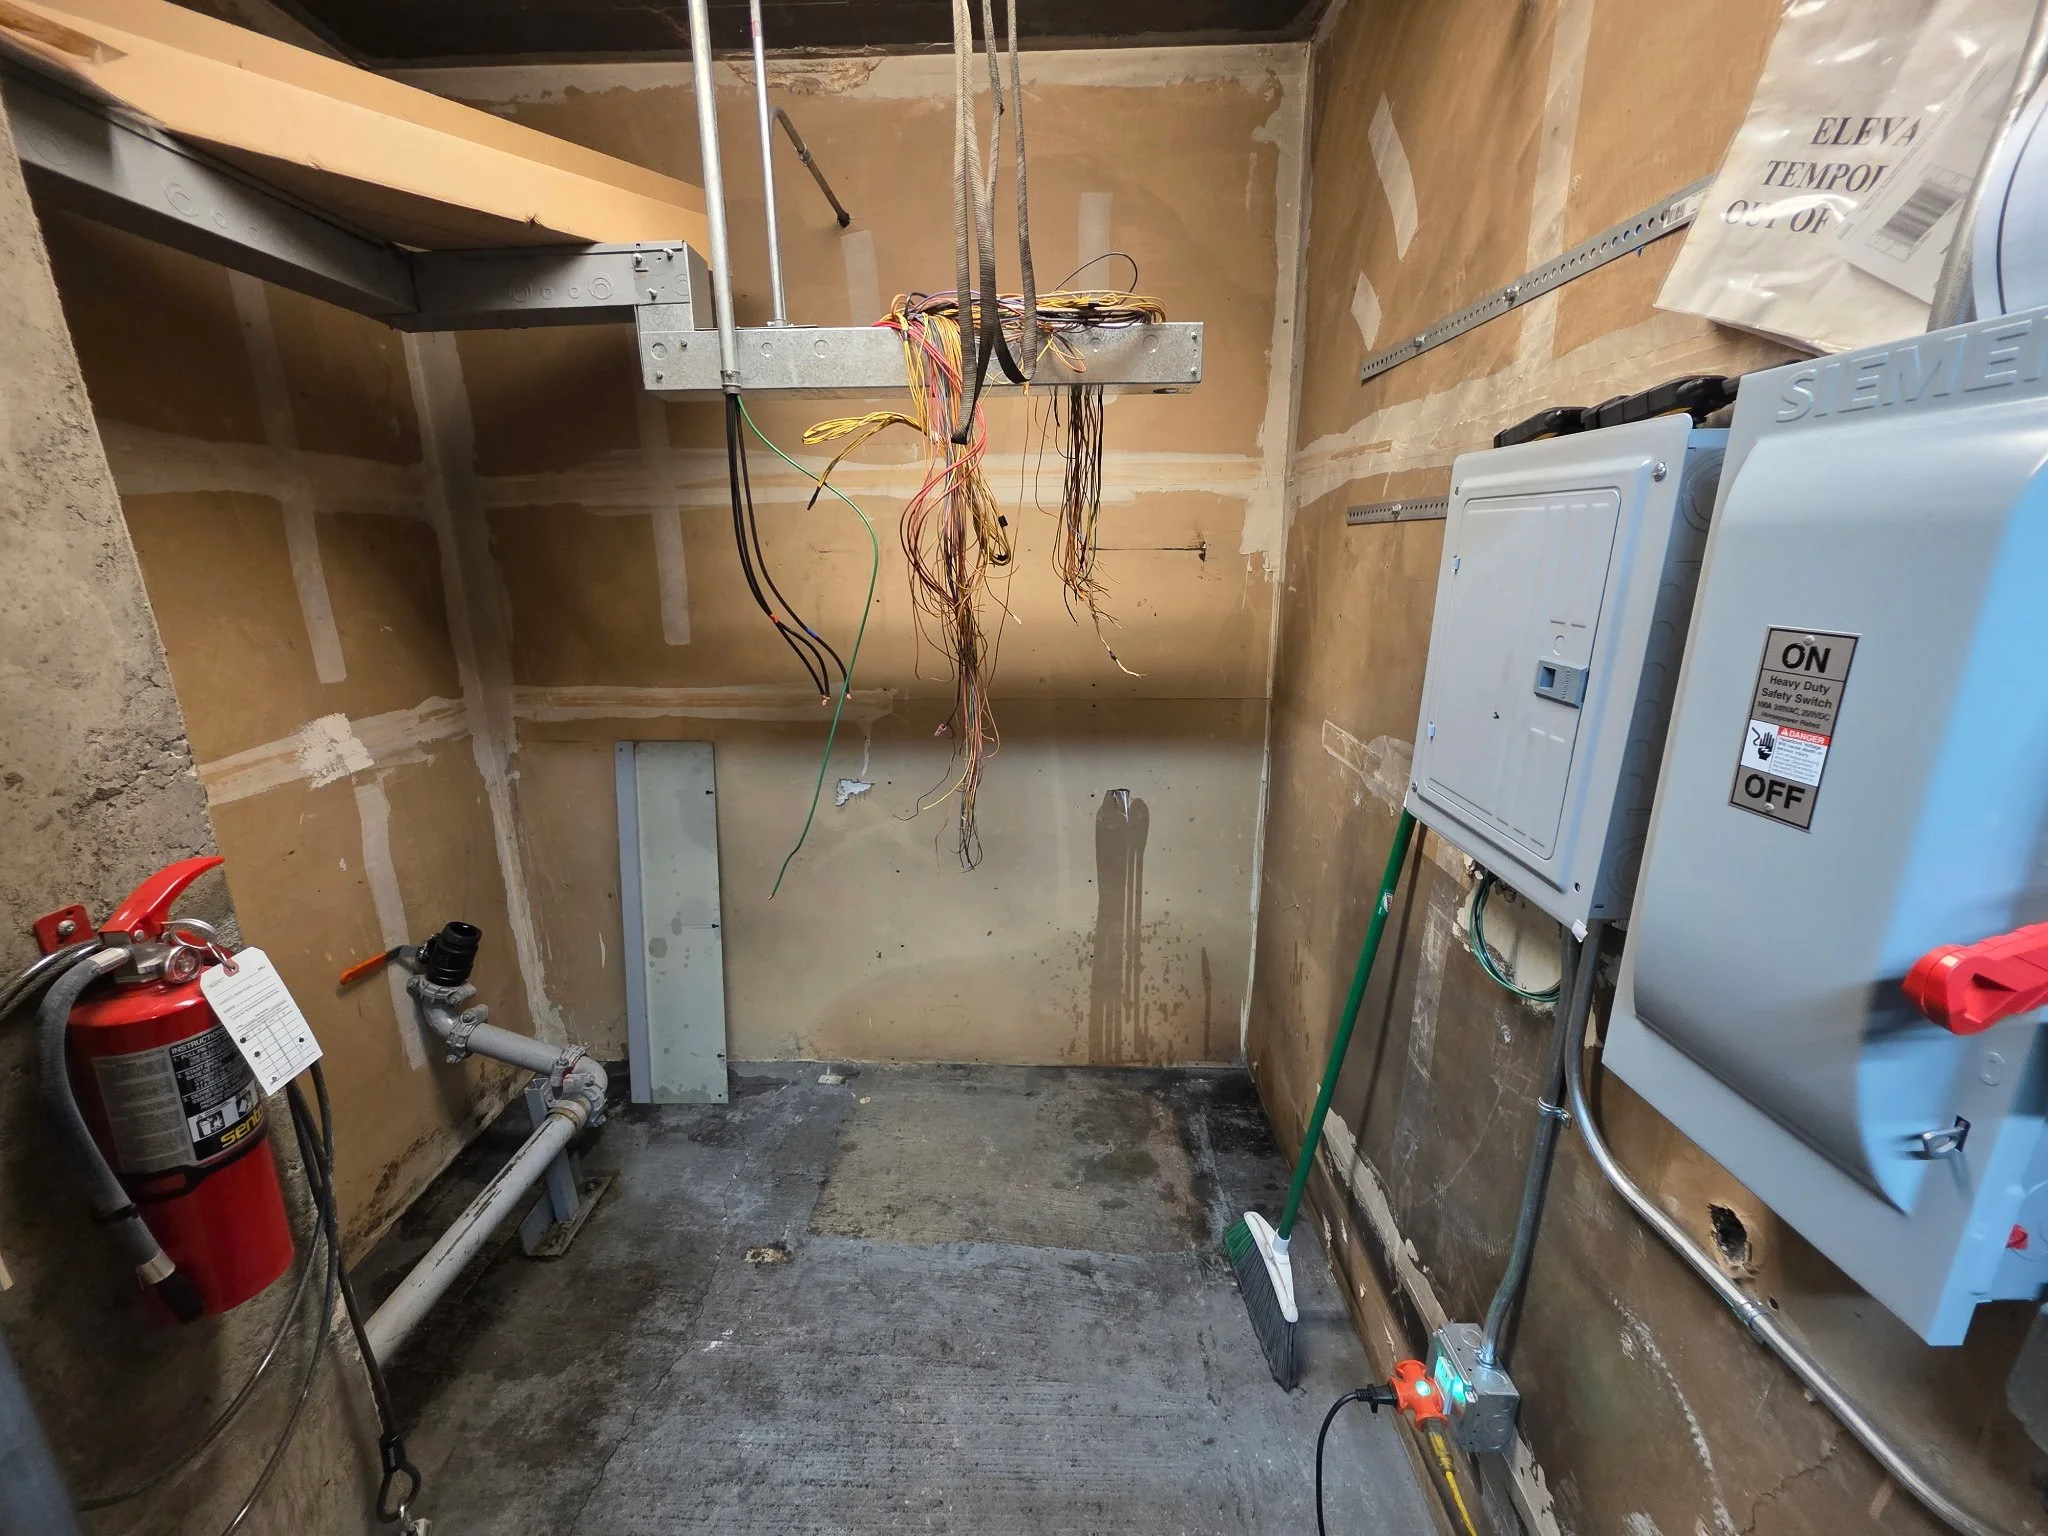
Machine room - controller and power unit have been removed. The oil line is left in place, as we will be reusing that. There will be modifications done to comply with code and extend the life.
Next we set the new Minnesota Elevator Inc. (MEI) submersible power unit. That’s the dark box in the back. The Elevator Controls (EC) Pixel controller is mounted to the power unit. The gray box mounted to the power unit. The oil line has been modified and connected to the power unit. Note the new shutoff valve (required by code) and wye-strainer (added for future maintenance).
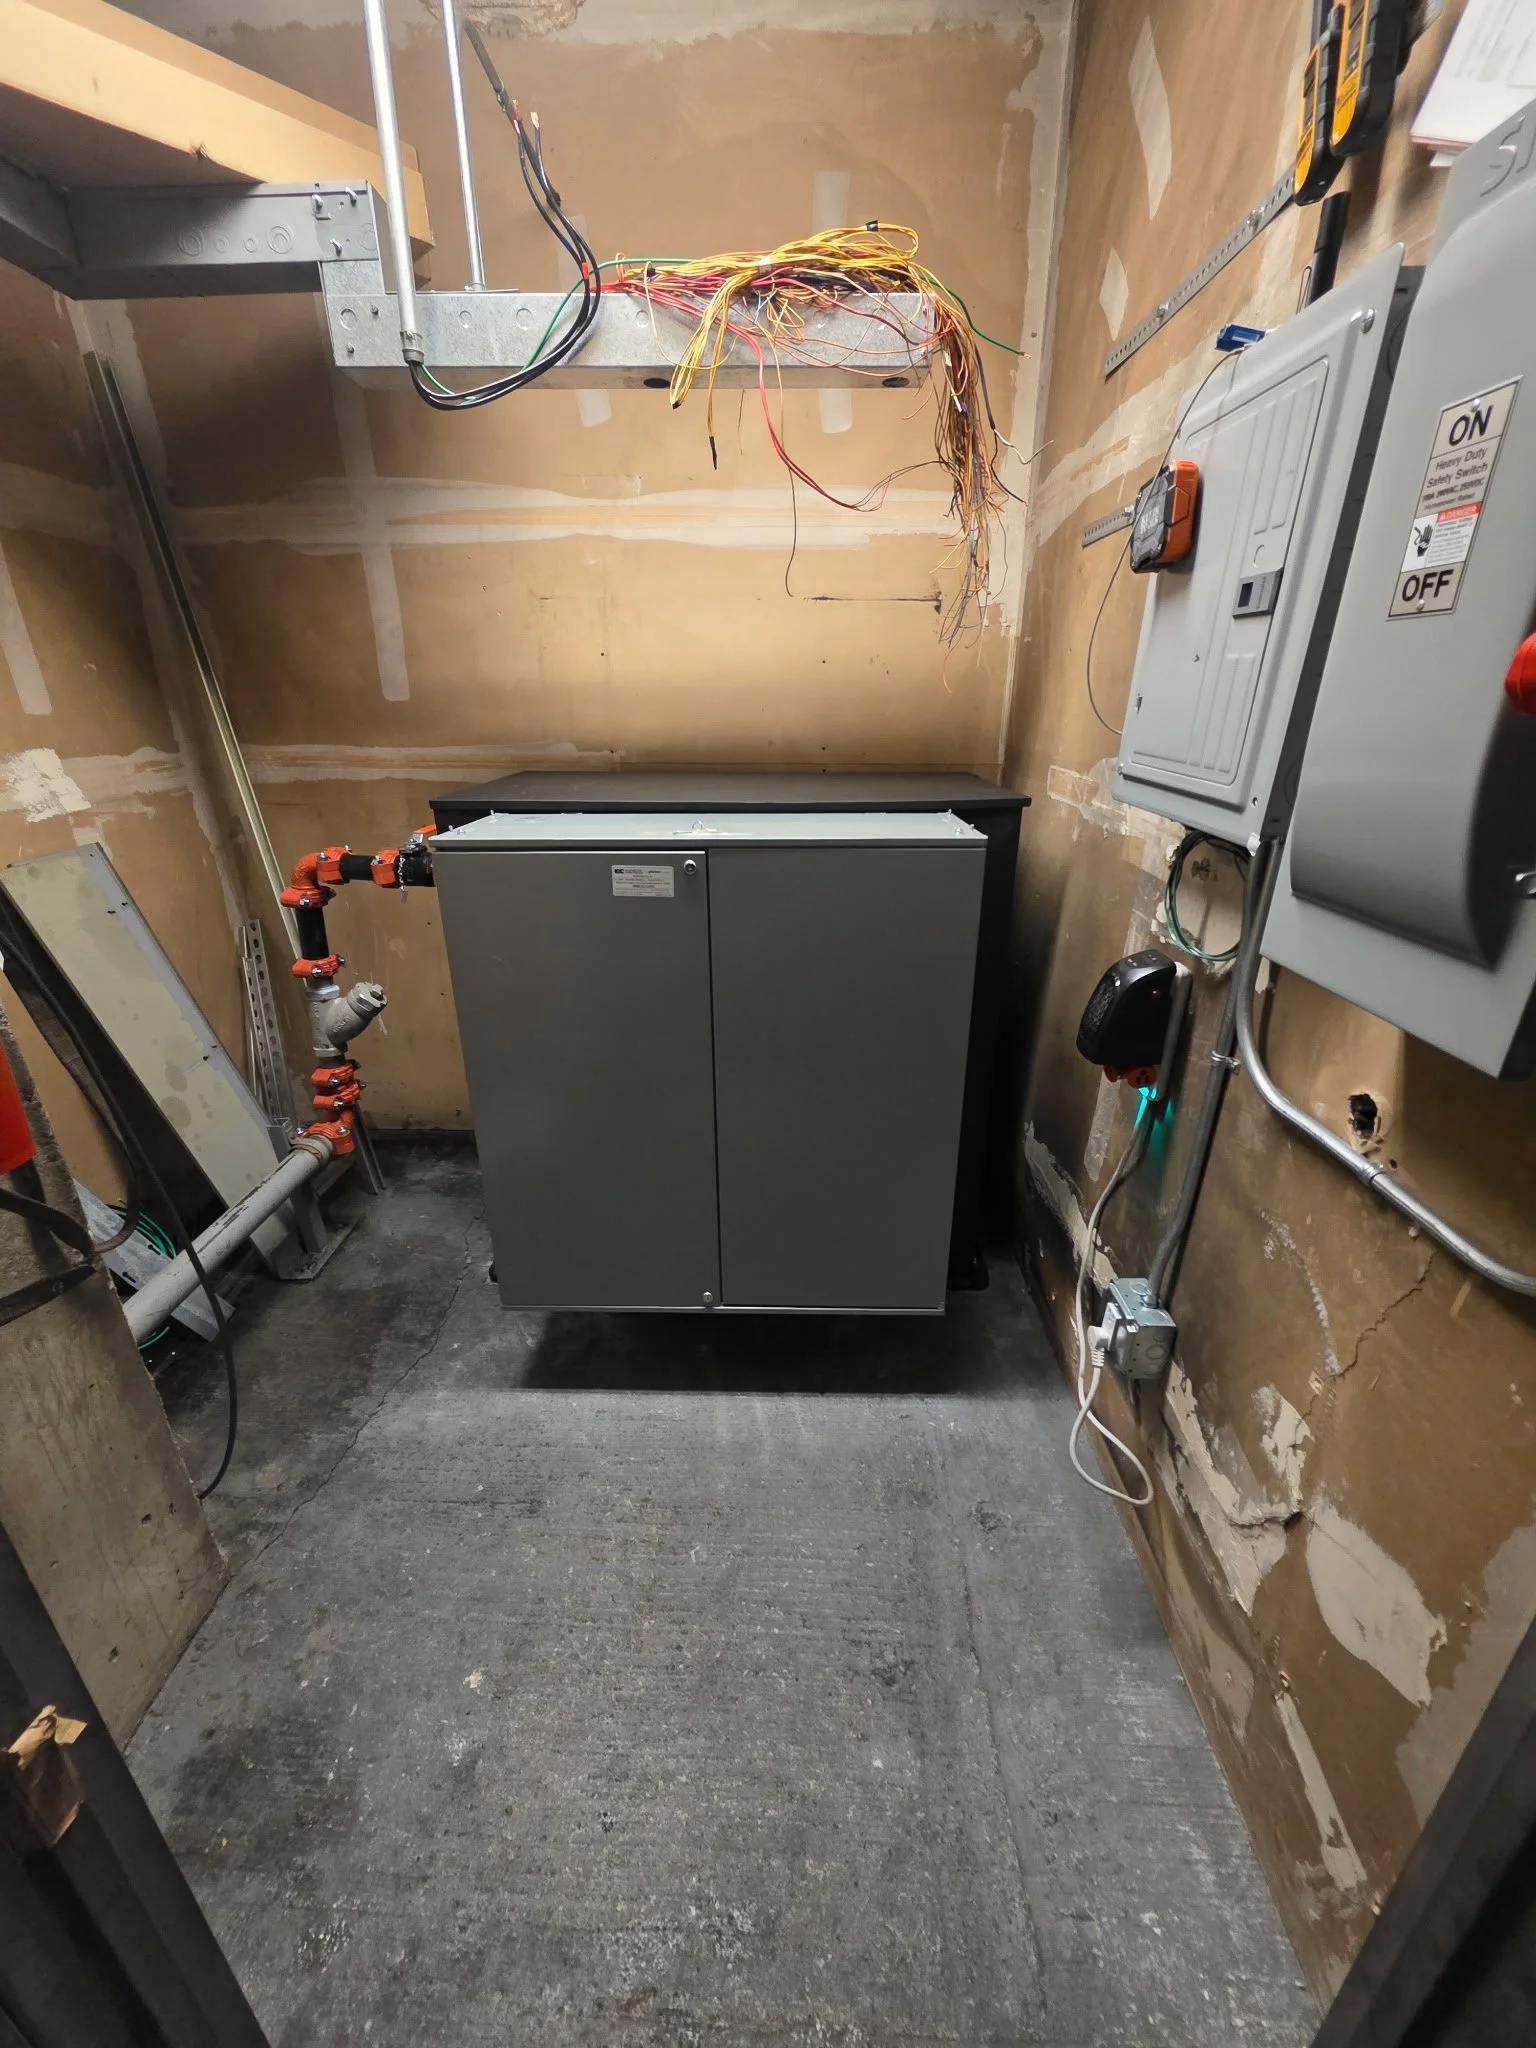
New tank and controller installed. With hydraulic oil line connected.
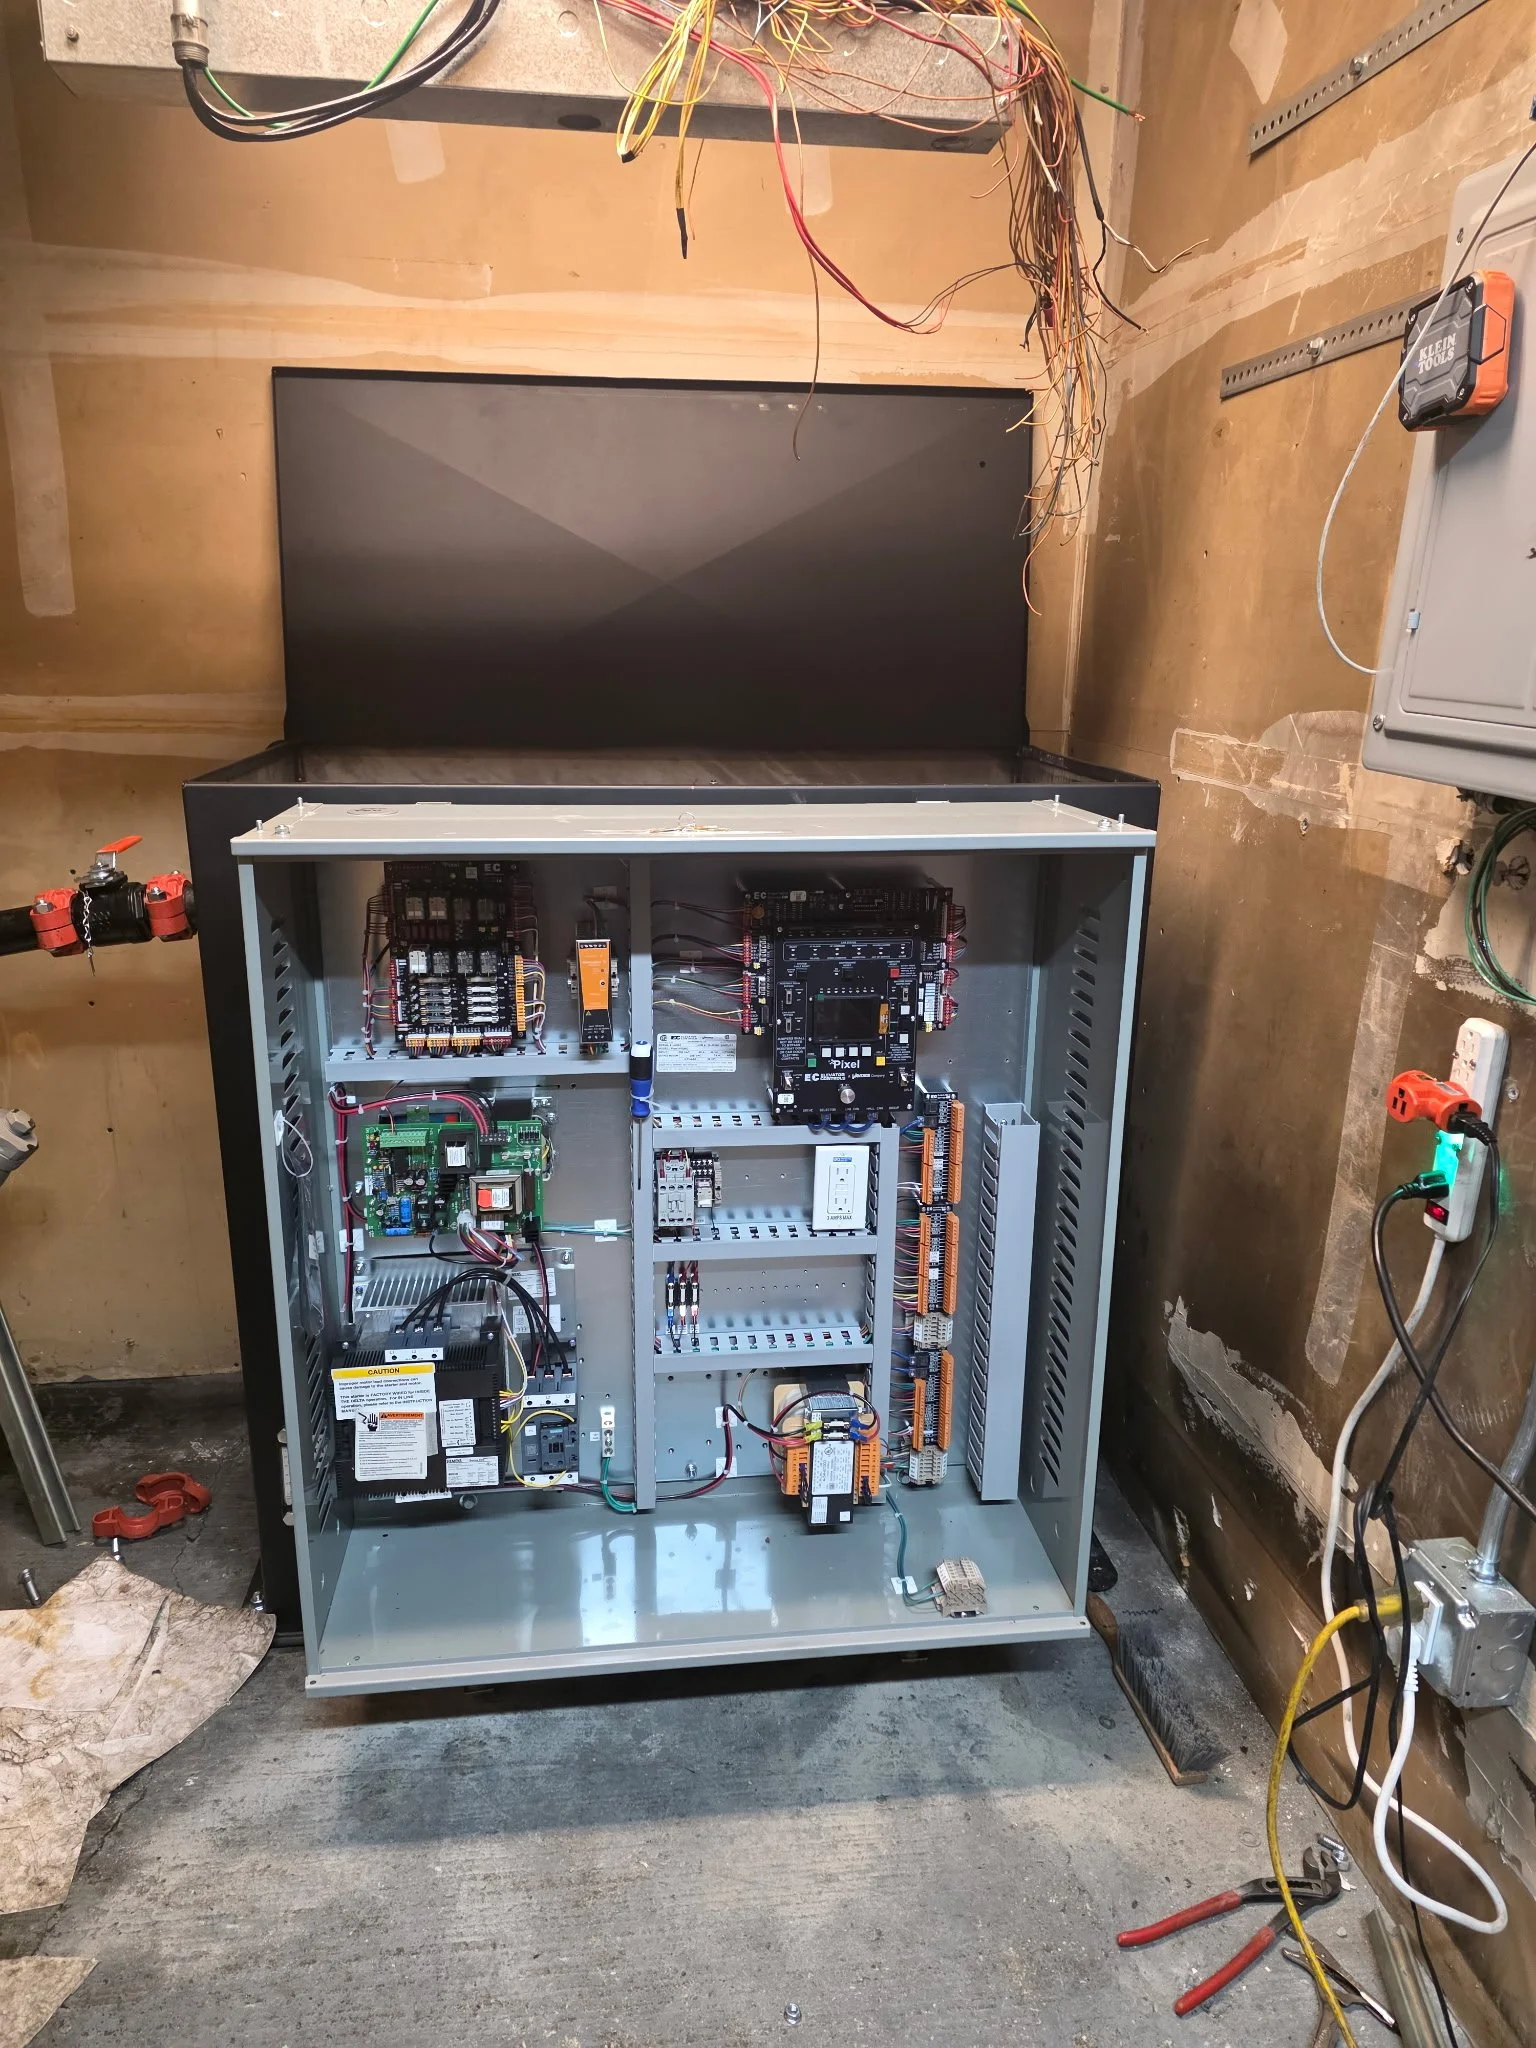
EC Pixel hydraulic elevator controller with cover removed.
VIP Parking